- By Profab /
- April 1, 2026

Table of Contents
A line slipping off a cleat doesn’t announce itself. One moment the boat is secured; the next, it’s drifting into the neighboring slip. Nine times out of ten, the cause isn’t the hardware — it’s the knot.
The cleat hitch is one of the most repeated actions in boating, yet it’s routinely done wrong. Skipped round turns, inverted half hitches, figure eights that look correct and release at the worst possible moment. Each mistake looks fine at the dock and fails at 2 a.m. in a building swell.
This guide covers three cleat knot techniques, when to use each one, the four errors that undermine them, and what the hardware itself needs to do its job.
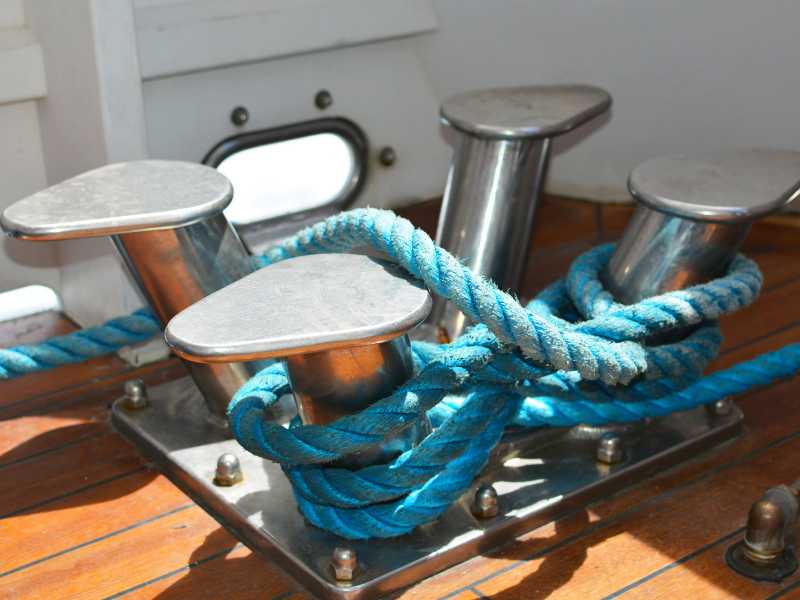
Know Your Cleat Before You Tie Anything
Not all cleats work the same way, and knot technique follows hardware design.
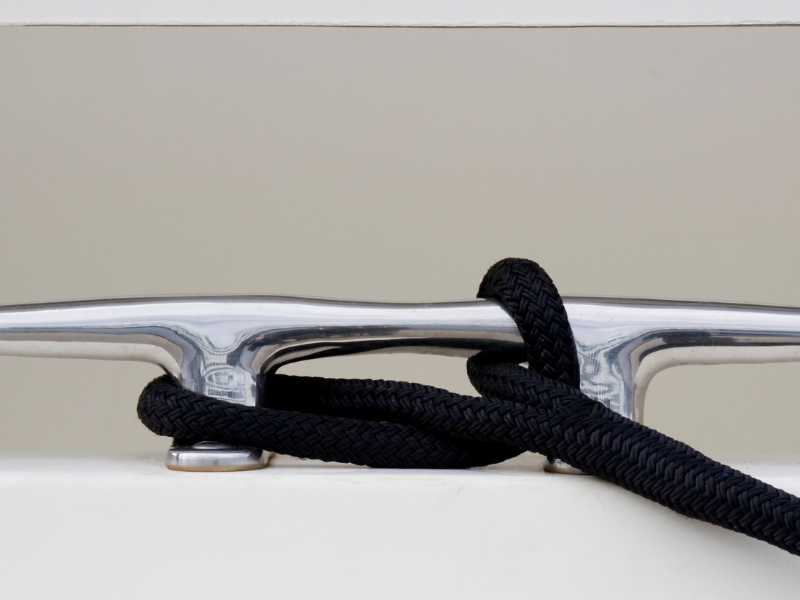
Horn cleats are the standard on docks and most powerboats. Two parallel horns project from a base plate bolted to the deck or dock surface. All three techniques in this guide are written for horn cleats.
Cam cleats use spring-loaded cams that grip the line automatically when fed through at the correct angle and release with a straight upward lift. Common on sailing dinghies and running rigging control lines. Tying knots on a cam cleat defeats the mechanism entirely.
Pop-up cleats sit flush with the deck when not in use and spring up to a deployed position. When deployed, they function as standard horn cleats. The same knot technique applies.
For background context on cleat geometry and historical use across vessel types, the Wikipedia entry on nautical cleats covers the range of configurations. The horn cleat remains the most widely specified fitting for dock lines, mooring lines, spring lines, and anchor rodes across commercial and recreational vessels.
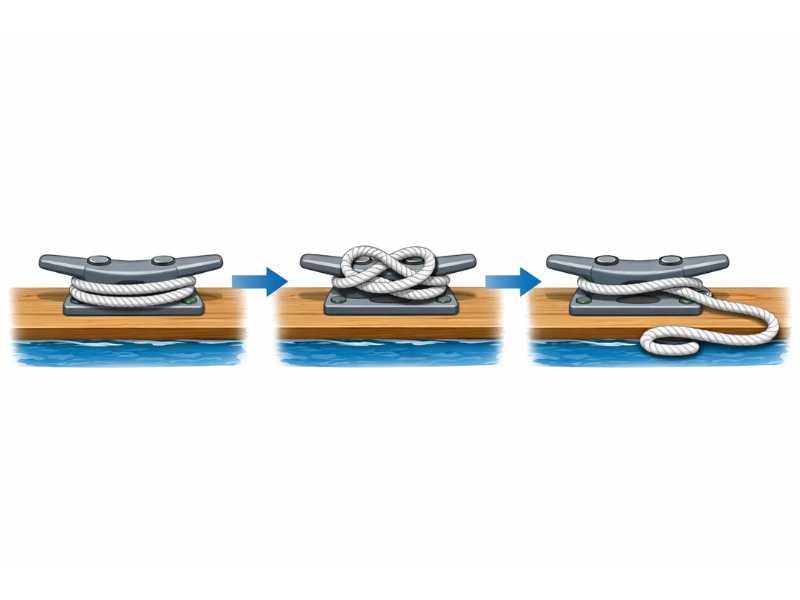
Knot 1: The Standard Cleat Hitch
This is the correct knot for everyday dock tie-up. It holds reliably under sustained load, releases quickly when you know the sequence, and doesn’t jam during a blow. Use this knot for bow lines, stern lines, and spring lines whenever the boat will be unattended or conditions may change.
Step-by-step
- Lead to the far horn. Approach the cleat from the direction of the load. Your first contact point is the horn farthest from the incoming line. This positioning ensures the first wrap creates tension against the load rather than across it.
- Full round turn at the base. Pass the line completely around the base of the cleat — a 360-degree wrap that runs below both horns. This single wrap carries the majority of the holding load through friction against the cleat body. Skipping it transfers all load to the figure eight, which is not designed to bear it alone.
- Figure eight. Take the working end up and over the near horn, cross diagonally under the cleat body to the far side, and back up over the far horn. Pull snug after each pass so the wraps lie flat.
- Locking half hitch. Form a loop in the working end of the line. Twist the loop so it opens downward — the free tail should exit on the side away from the boat when finished. Drop the loop over the near horn and pull the free tail parallel to the dock line, away from the cleat toward the water, to cinch the crossover point and seat the hitch firmly against the horn.
The one step most people invert:
The locking half hitch must be twisted so the free tail exits on the water side, not the boat side. Invert the twist and the knot appears identical from above but progressively loosens under cyclic tidal and wind loading. This is the knot that “came undone by itself.” Check the tail direction every time.
Knot 2: The Quick-Release Cleat Hitch
Fuel dock. Guest slip. Running bow line while the stern is still being handled. These situations call for a knot that goes on fast and releases with one motion. The quick-release version omits the locking half hitch and relies solely on the figure eight for short-duration holding.
Step-by-step
- Round turn at the base. Same as Knot 1. Never skip this regardless of how temporary the tie-up is. The round turn prevents the figure eight from slipping sideways off the cleat under load.
- Figure eight only. One clean figure eight over both horns. Pull snug.
- Free end staged for release. Leave the free tail long and visible rather than tucking or coiling it tightly. When departure time comes, one pull on the tail releases the figure eight and the round turn runs free.
This version releases under load, which is its purpose. A fueling attendant can hold the line from the dock, the skipper calls “cast off,” and the line drops in one motion. With a locking half hitch, a release under tension can jam.
The limits are real: two figure eights without a locking hitch will hold for a 20-minute stop in calm harbor conditions. They will not hold reliably in a tidal berth overnight, in wake from passing traffic, or in any sea state where the boat is surging. The quick-release hitch is a tool for attended, short-stay docking only.
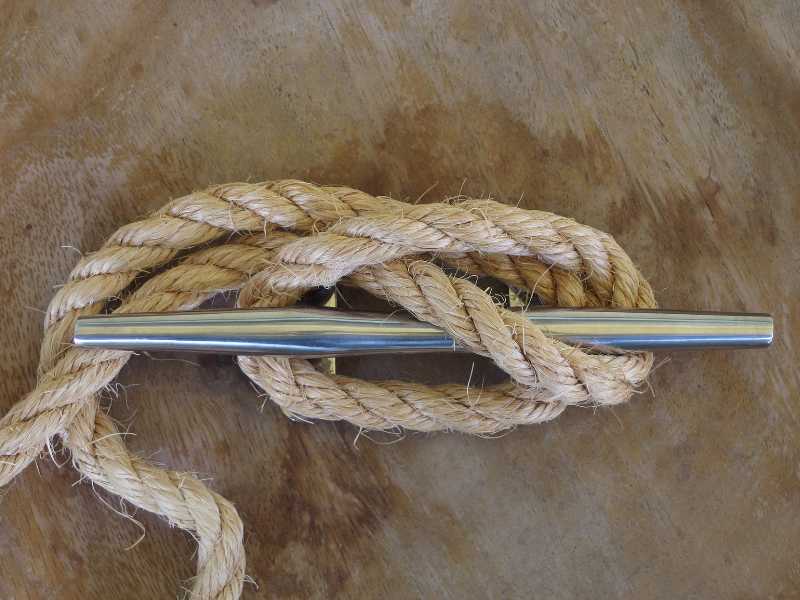
Knot 3: The Round-Turn Heavy-Load Hitch
When the load is elevated or conditions are rough, adding a second full round turn before the figure eight significantly increases the knot’s friction capacity. This is the correct technique for spring lines in tidal berths, anchor rode cleated at the bow, stern lines in exposed anchorages, and any situation where a line will carry elevated load for an extended period in variable conditions.
Step-by-step
- Two full round turns at the base. Make two complete 360-degree wraps around the cleat body before starting the figure eight. Keep the turns tight and parallel; crossed or overlapping base wraps reduce friction efficiency.
- Figure eight. Same pattern as Knot 1 — up over the near horn, cross under, up over the far horn.
- Locking half hitch. Mandatory with this technique. The additional base friction means the figure eight and locking hitch carry less load per cycle, which reduces wear on the line and keeps the final hitch from jamming during release.
The practical result of two base wraps versus one: in heavy weather, the difference determines whether the knot releases cleanly when conditions improve or has to be cut free. A jammed cleat hitch on a working boat in a blow is a real problem, not a theoretical one.
For a grounding in how friction distributes across hitch-type knots and why additional turns reduce peak load on the final locking element, the Wikipedia article on hitch knots covers the mechanical principles.
The 4 Mistakes That Undo a Good Knot
All four of the following errors look acceptable at first inspection. Each one fails under load or time.
| Mistake | What It Looks Like | Why It Fails |
|---|---|---|
| Starting on the near horn | First contact with the horn closest to the incoming line | Load angle pulls the first wrap sideways off the horn before friction builds at the base |
| Skipping the round turn | Line goes directly from approach to figure eight | No friction base. Figure eight carries full load and can creep or jam depending on line stiffness |
| Locking hitch inverted wrong way | Free tail exits toward the boat, not the water | Cyclic loading progressively walks the hitch loose. Looks secure; fails over hours |
| Too many wraps | Multiple figure eights stacked on the cleat | Jams under sustained load. No additional holding benefit. Takes excessive force or a knife to release |
Of the four, the inverted locking hitch is the most common and the most consequential. It produces a knot that passes a casual inspection, holds initially, and then releases at an unpredictable moment. The correct twist direction takes five seconds to check. It’s worth doing on every tie-up until the sequence is automatic.
Line Choice Affects How the Knot Behaves
Rope characteristics change how each of these knots perform, particularly in cold or wet conditions.
Stiff braided lines and large-diameter rope benefit from two base wraps (Knot 3) even in calm conditions, because the added friction compensates for reduced flexibility in the locking hitch. Worn, compressed, or salt-contaminated rope holds less predictably regardless of technique. A dock line that has been flattened from years of tidal load should be replaced before the season begins.
For sizing, three-strand nylon remains the most forgiving choice for docking because it stretches under surge loads and absorbs energy rather than transferring it directly to the cleat base. Polyester double-braid stretches less and is preferred for situations where minimal movement is needed, such as a boat secured in a tidal berth near a fixed dock.
When the Cleat Itself Is the Problem
A correctly tied cleat hitch on an undersized or degraded cleat is still a failure waiting to happen.
Cleat sizing relates directly to dock line diameter. A common ABYC-referenced guideline is one inch of cleat length per 1/16 inch of line diameter, rounded to the next standard size. A vessel running 1/2-inch dock lines needs an 8-inch cleat for adequate wrap clearance; 5/8-inch lines require a 10-inch cleat. Boat length is a rough proxy, but displacement, freeboard, and local current conditions are the factors that actually determine load. The cleat sizing table below provides a working reference:
| Dock Line Diameter | Minimum Cleat Length (ABYC Reference) | Typical Vessel Range |
|---|---|---|
| 3/8 in (10 mm) | 6 in (150 mm) | Under 20 ft, light displacement |
| 1/2 in (12 mm) | 8 in (200 mm) | 20-28 ft, standard displacement |
| 5/8 in (16 mm) | 10 in (250 mm) | 28-38 ft, moderate displacement |
| 3/4 in (18 mm) | 12 in (300 mm) | 38+ ft, heavy displacement or offshore |
Material selection is not optional in saltwater environments. Nylon cleats and chrome-plated zinc hardware have adequate service life in freshwater recreational marinas. Coastal, tidal, and offshore use requires marine-grade stainless steel — specifically 316 or 316L. Both grades contain 2 to 3 percent molybdenum, which gives them resistance to chloride pitting that standard 304 lacks.
The distinction between 316 and 316L matters for welded assemblies. The “L” designation (low carbon, max 0.03% C vs. 0.08% C for standard 316) prevents intergranular corrosion in the heat-affected zone after welding. If a cleat’s horns are welded to the base plate, 316L is the correct material to prevent sensitization and weld decay in a saltwater environment. For cleats machined from solid bar stock, passivated, and with no welds, 316 and 316L have equivalent corrosion performance. Ask your supplier which manufacturing method applies before specifying the grade.
| Dock Line Diameter | Minimum Cleat Length (ABYC Reference) | Typical Vessel Range |
|---|---|---|
| 3/8 in (10 mm) | 6 in (150 mm) | Under 20 ft, light displacement |
| 1/2 in (12 mm) | 8 in (200 mm) | 20-28 ft, standard displacement |
| 5/8 in (16 mm) | 10 in (250 mm) | 28-38 ft, moderate displacement |
| 3/4 in (18 mm) | 12 in (300 mm) | 38+ ft, heavy displacement or offshore |
Material and fastener selection summary:
- Freshwater and sheltered harbors: 304 stainless or anodized aluminum is adequate
- Coastal and tidal berths: 316 stainless minimum
- Offshore and exposed anchorages: 316L for welded assemblies; 316 or 316L for machined components
- Through-bolts: A4-70 or A4-80 (marine-grade 316 stainless) — never carbon steel fasteners in saltwater environments, which will initiate galvanic corrosion against the cleat base
- Electropolished finish: removes surface contaminants and optimizes the passive chromium oxide layer — specify for high-corrosion applications
Backing plates are structural, not optional. A cleat through-bolted into fiberglass without backing will pull through under a hard tidal surge or wake from a passing vessel. Stainless steel backing plates sized to distribute load across at least 4 square inches per bolt are the standard approach for GRP hull and deck installations.
For procurement teams and OEM builders sourcing precision-machined fittings with material certification, Profab Machine manufactures stainless steel boat cleats in 304 and 316 alloys, CNC-machined from solid bar stock at its Ningbo facility, with MTR documentation and full dimensional traceability available on request.
Conclusion: Three Knots, One Standard
The right technique depends on the situation:
- Standard cleat hitch: round turn, figure eight, locking half hitch. Use for all overnight, unattended, and standard docking scenarios.
- Quick-release hitch: round turn, figure eight, no lock. Short stays only, attended vessel, calm conditions.
- Heavy-load hitch: two round turns, figure eight, locking half hitch. Spring lines, anchor rode, storm conditions, any elevated-load scenario.
The knot does its job when the technique is correct and the hardware matches the load. Get both right and you won’t be revisiting this in the dark.
Send Inquiry Now
Related Resource
How to Stop Your Boat Cleats from Squeaking

How to Size Your Boat Cleats Correctly
Backing Plates Decide Whether Your Boat Cleat Actually Holds